Since the shift of man from a nomadic lifestyle to that of a more settled one, few developments have been as monumental as the ones pertaining to food. At least, as far as I’m concerned. Step aside, invention of the wheel: I’m here to talk about dumplings.
It seems as though every major culture in the world has a variation of dumplings, from the humble momo of the Himalayas to the rich (and ever-popular in Pittsburgh) Polish pierogies. As a culture that has assimilated every conqueror and turned them into cultural collaborators, Russians, of course, have their own version of dumpling: pelmeni.
These pelmeni are dearly loved in my family. A recipe that has been passed down through my paternal grandmother and employs her old-school techniques, I would recommend you only embark upon this if you have about four hours to kill. The process is slow, which is what makes it a popular wintertime recipe — when it’s cold outside and even the dogs don’t want to leave the porch to do their business, make some dough, put on your latest Netflix binge, and get to work. The nice thing about this recipe, however, is that it will yield approximately 200 little dumplings, able to be batched out in Ziploc bags and frozen in perfect serving sizes.
The filling:
2 lbs ground meat
You’ll need three kinds of meat for the best results, as well as the most traditional taste. In my family, we do a blend of turkey, beef, and lamb. It keeps the recipe fairly lean while giving the pelmeni a rich flavour.
One large onion or two medium ones, finely minced
One bunch parsley, finely minced
One bunch dill, finely minced
Between 1-4 cloves of garlic, depending on your personal feelings about it
One heaping teaspoon of black pepper
1.5 teaspoons of salt — if you’re a big fan of salt, use a little more, but I’ll talk later about how you can increase the salt taste when you’re cooking the final product
Mix all of the above ingredients in a large bowl, ideally by hand, to get the mixture fully incorporated. You can use a spatula if you’re weird about touching raw meat. Add roughly one cup of water — the mixture should be loose and kind of wet, the consistency of thick sour cream, in my mom’s words. [NOTE: For two pounds of meat, as in this recipe, you may end up using up to 2 cups of additional water, depending on the fat content of the meat you use. As you shape your pelmeni, and the meat mixture sits out during the process, it begins to take on water and thicken up again. Don’t be surprised if you have to add water to your meat mixture midway through the shaping process.]
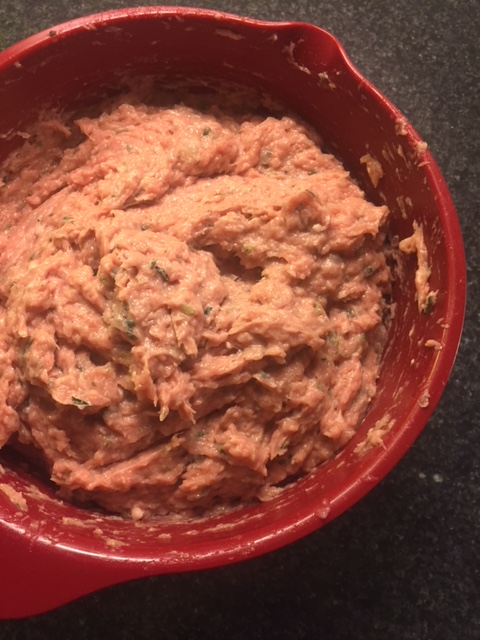
Cover the mixture with plastic and set aside.
The dough:
In a separate bowl, or a stand mixer, you will use a tried and true technique my grandmother had passed down from her grandmother, which she taught to my mother, which my mother has taught me, and now I am imparting to you fine readers. Follow along closely, but I promise it’s not hard.
You’ll need 6 eggs for this mix. 2 eggs = 3 eggshells full of water. Don’t panic, this will all become very clear. As I mentioned, this is my paternal grandmother’s technique from the Ural Mountains. No measuring cups were available then, and much in the spirit of pinches, dashes, dabs, and handfuls, the “egg full of water” fits neatly into that style.
First, you’ll open up the end of an egg with a small, sharp knife, careful not to break the entire yolk.
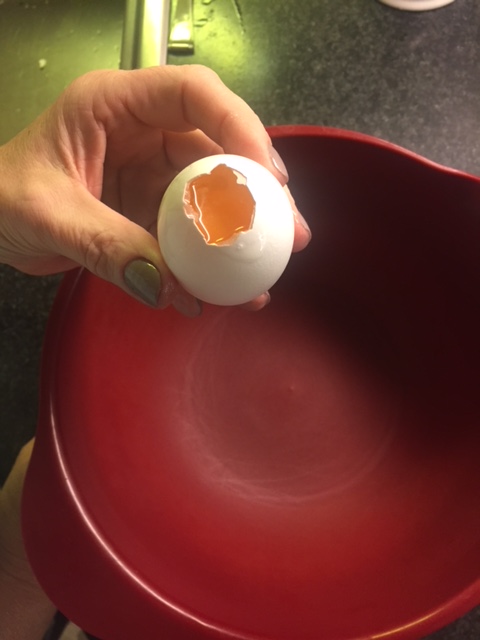
Dump the egg contents out into the bowl. Retain the egg shell.


Now, fill the egg shell carefully with cold water so that it fills up entirely. This is an egg’s worth of water. You’ll fill it up and empty it into the bowl nine times, if you recall our earlier equation. Add the remaining 5 eggs into the mix at this time. Then, begin beating your egg and water mixture with a whisk. Fold in 5 cups of flour, one at a time.
Empty the dough onto a well-floured cutting board. Turn the dough in ample flour a few times so it’s easier to handle. Cut the dough in half and put the other half into a plastic freezer bag. Set aside at room temperature.

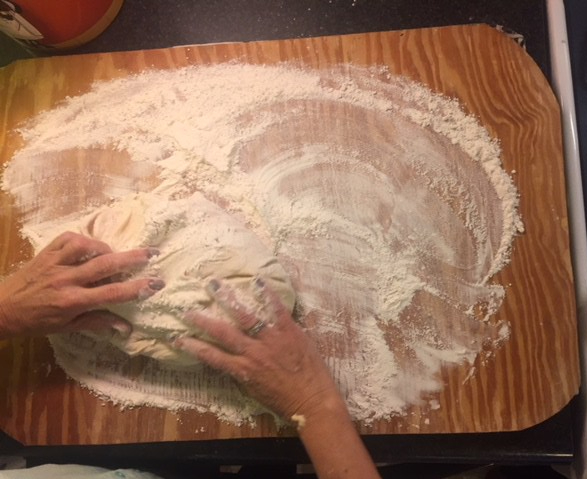

Working with the dough left on the cutting board, continue to work the dough in more flour. It should feel soft and fluffy in your hands, and neither stiff nor overly sticky. Cut this piece you’re working with into another three pieces, and set the other two aside, covered in plastic wrap or into another Ziploc or freezer bag so it doesn’t dry out. In the meantime, roll the piece on the cutting board into a long round sausage about 1” in diametre.

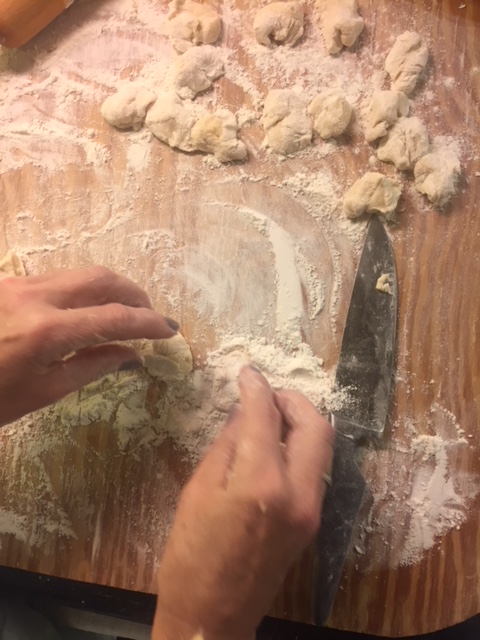
Cut the sausage into little segments, up to 1″ but no bigger. This will yield you small, manageable pelmeni that are easy to portion out and freeze, and yields a greater quantity in total.
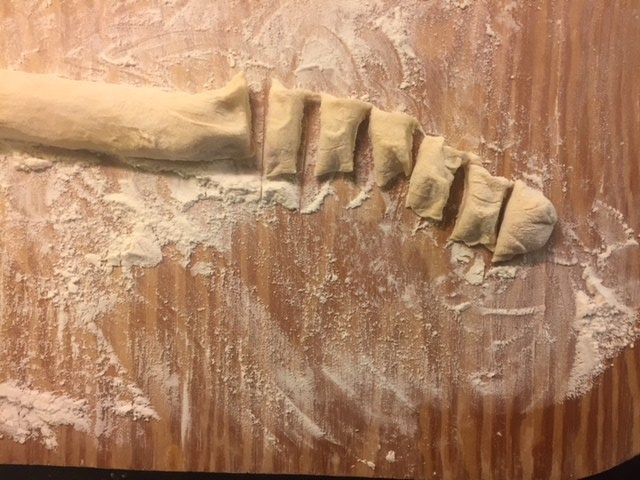
Each little segment is then pinched into well-floured dough balls, covered in more flour, and set aside on the board. You can continue adding ample flour during the entire dough process, so nothing becomes sticky or difficult to manage.
Then, in batches, begin taking the dough pieces and shaping them into a rough circle. Continually flipping them in more flour, use a small rolling pin and roll each one out into a flat disc, flipping them in flour and rolling again, until you get a little round disc about 3″ in diametre.
")


Prepare a baking sheet with wax or parchment paper dusted with flour. Set a small bowl of cold water near your work station. This will be available to use just in case you are have trouble making the edges of your pelmeni stick. A simple dab of your fingers in the water, then onto the dough, will act as a glue. And remember, less is more — you don’t need a lot of water to make this work.
So, here’s how you put it all together:
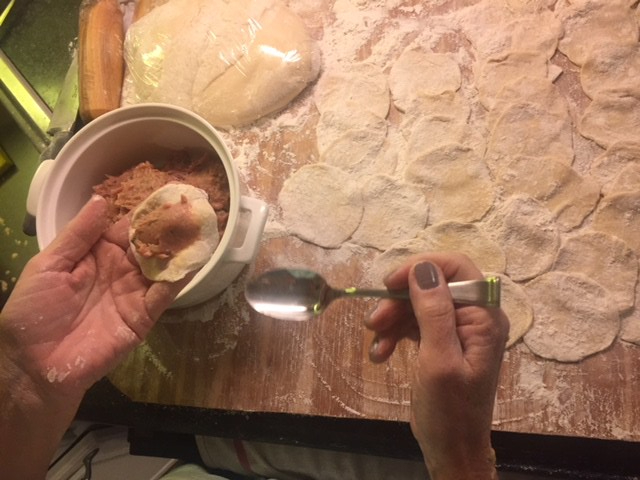
Take one round disc into your left palm. With your right hand, spoon a little bit of the meat mixture and set it directly into the center of the disc, trying to keep it in one clean little gob. Use your fingers underneath the disc to get the last bits scraped off of the spoon, avoiding getting the meat on the edge of the disc.
Then, with your right hand, fold the disc in half over the meat in your left hand. Pinch the two sides together in the middle of the touching edges.
Starting at one side, pinch the corner and neatly “sew up” the edge from the corner to the center pinch. Repeat all the way around the other side, until you have a little closed up half-moon dumpling.

Now, take both corners and draw them toward each other, creating an overlap of the corners and pinching firmly into place.

Set the completed pilmeni in neat rows on your baking sheet, careful not to let them touch too much, lest they all stick together and ruin your hard work.

Essentially, you continue to repeat the first few steps until the dough is gone: take a section of dough, roll it into a long snake, cut the segments, shape them, round them, roll them out in more flour, construct your pelmeni, and place them on more lined and floured baking sheets.
Now, this is a very important step, because after all of this hard work, the worst thing of all would be to watch everything you’ve done fall apart. This is also where doing this in the dead of winter comes in handy, because none of us have freezers big enough to hold all of these little guys. You want them to sit in freezing temperatures for a MINIMUM of two hours. If you have a porch or balcony, or maybe an unheated attic in which you can open the winters and create a walk-in cooler, cover the sheets very lightly and carefully with plastic wrap or cheesecloth (very careful not to press on the dumplings) to protect from the outdoor elements and set them in the cold to firm up.
Assuming you aren’t feeding an army immediately after the freezing step of this process, the best thing to do is to portion out the pelmeni in little freezer bags. I like to do 10 to a bag, as that is a perfect serving size for one person. It’s also a nice round number and makes the counting more pleasant, if you’re a little bit obsessive like that.
When you’re ready to cook, serve, and eat, here’s what you’ll do:
Fill a pot with salted water. Here is where the additional salting is useful if you like things salty, or if you discover that you skimped on salt during the filling process. I do a generous pinch of salt, personally, but you do you. Add a bay leaf and a few black peppercorns. When the water comes to a rolling boil, toss in your desired portion. Once your pelmeni all float up to the surface (usually after about 10 minutes), set a timer for two more minutes of cooking. Drain, and serve with a splash of white vinegar, a pat of butter, and sour cream on the side, if desired. You can also finely chop some fresh dill and toss it on top. Lesser men have used ketchup, but keep that blasphemy far away from me.
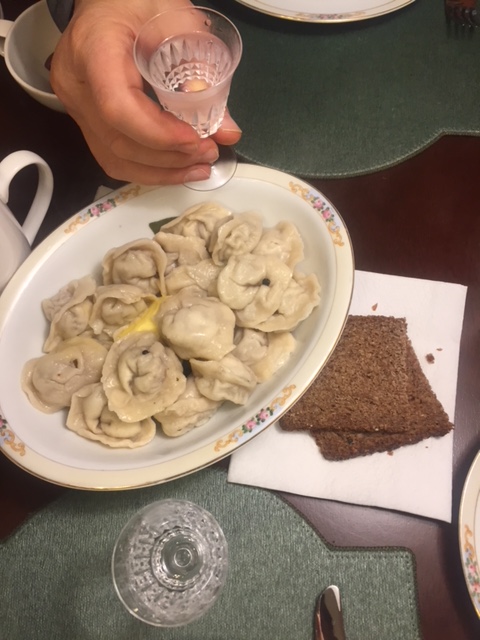
Na Zdorovye!
